Deleting a Project
Learn how to permanently delete a single project in Deficiency Detect from its Project Settings, including cancellation options and confirmation.
Steps to Delete a Project
Access Project Settings
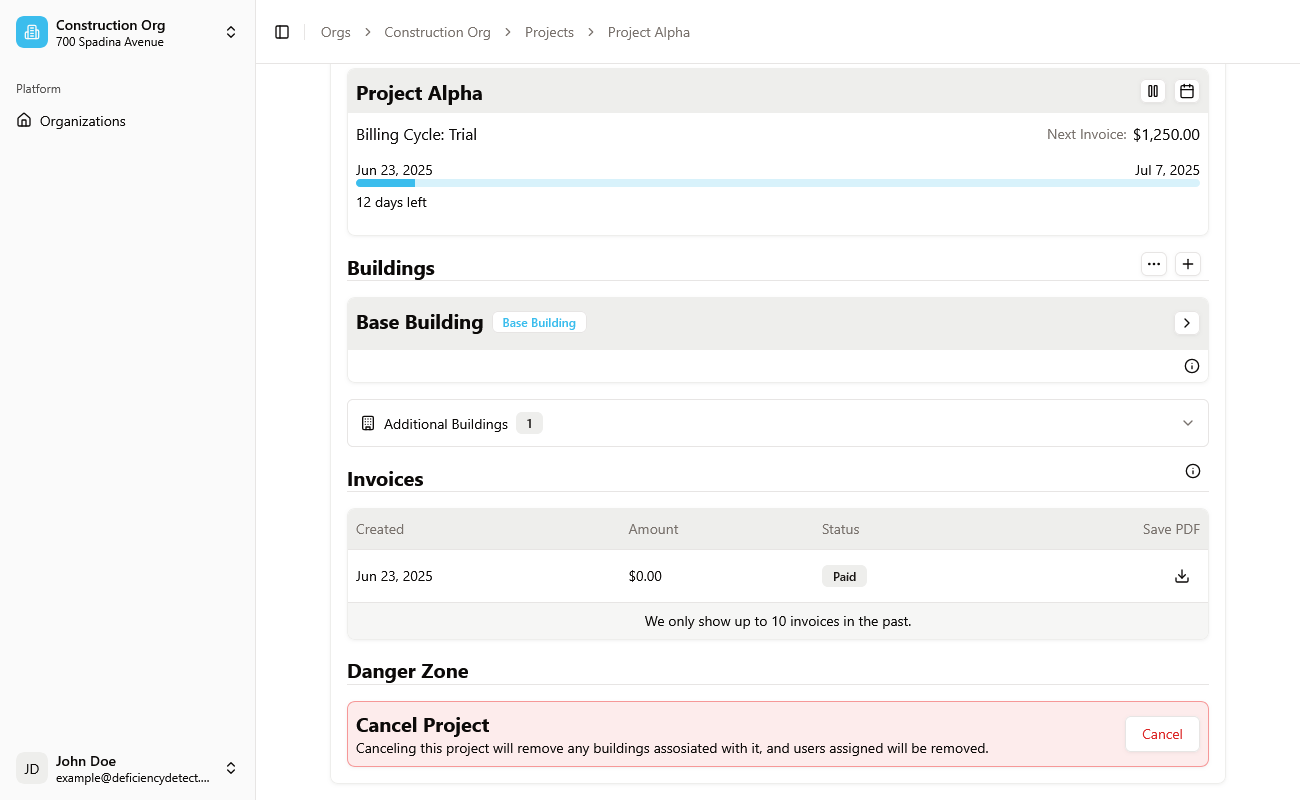
First, navigate to the Project Settings page for the specific project you wish to delete. You can do this by going to your organization's projects list and clicking the "Settings" button on the desired project's card.
Navigate to the Billing Tab
On the Project Settings page, click on the "Billing" tab. This tab provides an overview of the project's financial status and administrative options.
Locate the Danger Zone
Scroll to the bottom of the "Billing" tab until you find the "Danger Zone" section. Here, you will see a "Cancel" button.

Confirm Project Cancellation
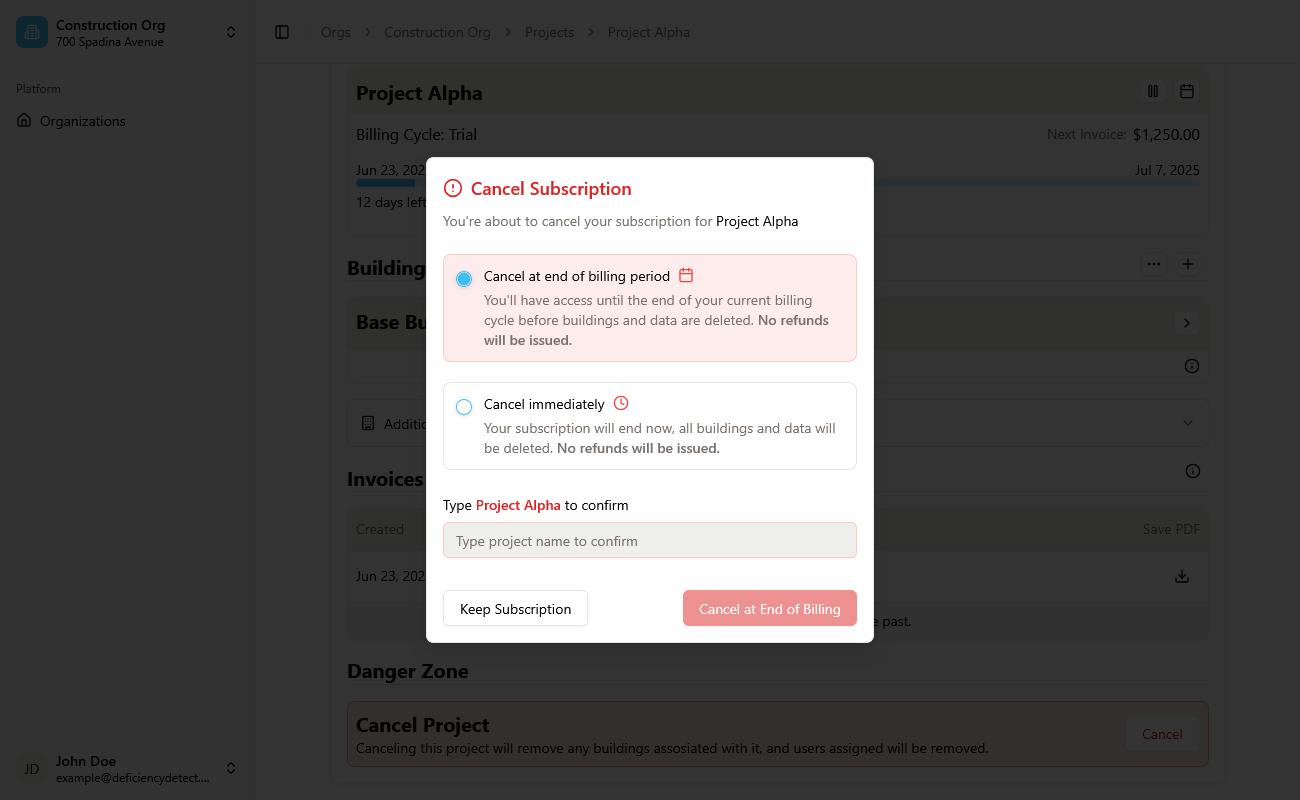
Click the "Cancel Project" button. A confirmation alert dialog will appear, giving you options for how to finalize the cancellation:
- Immediately with no refund: The project will be canceled instantly, and any remaining portion of the current billing cycle will not be refunded.
- End of billing cycle: The project will remain active until the end of its current billing cycle, at which point it will be automatically canceled.
Select your preferred cancellation method.

Project Deletion Complete
After confirming your cancellation choice, the project will be deleted according to your selection. You will be redirected back to your organization's projects list, and the deleted project will no longer appear.
Important Note: Deleting a project is an irreversible action and will permanently remove all associated data, including its buildings, deficiencies, and uploaded files. Please ensure you have backed up any necessary information before proceeding.