Building Settings
A step-by-step guide to accessing and updating a building's information and photo within your project settings in Deficiency Detect, crucial for accurate project data.
Info Tab
The Info Tab within a Building's Settings is where you finalize crucial details and add visual context for each individual structure within your project. Completing this setup correctly is vital for full platform compatibility and ease of use in deficiency tracking.
Select a Project
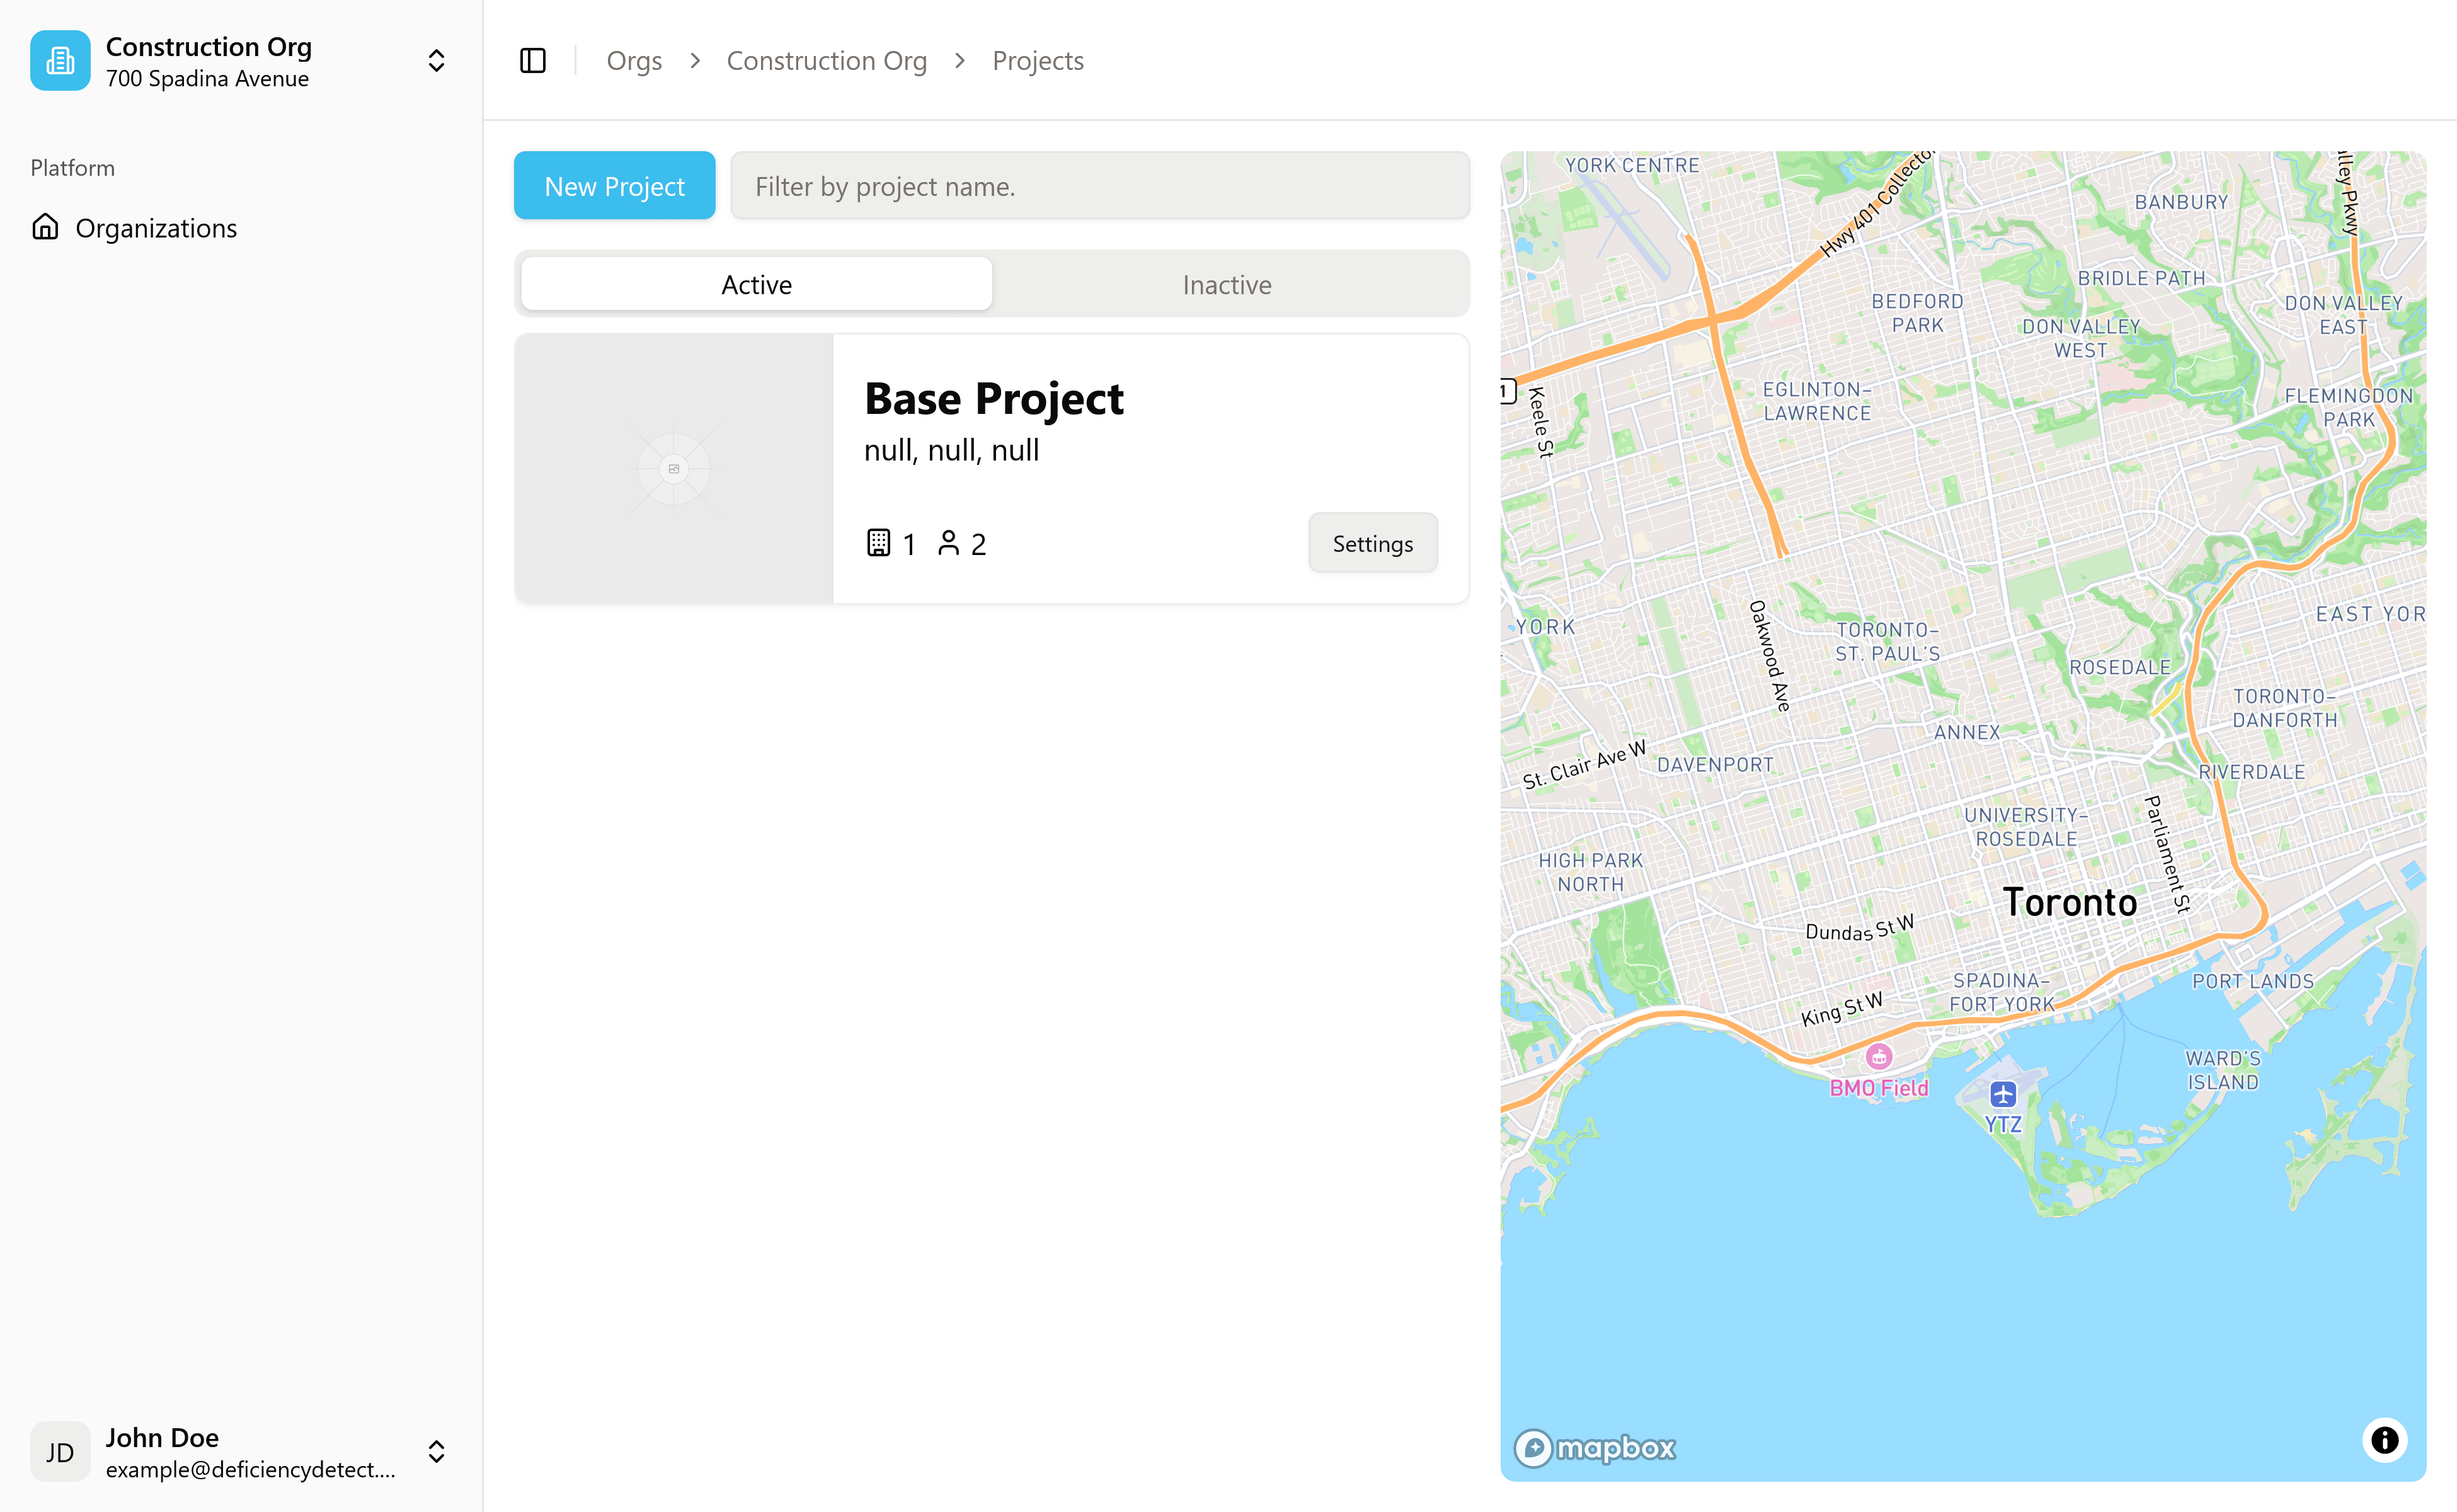
From your Organizations dashboard (/orgs), select the organization and then click on a specific project from the list. This will redirect you to that project's dedicated page, displaying all buildings associated with it.

Access Building Settings
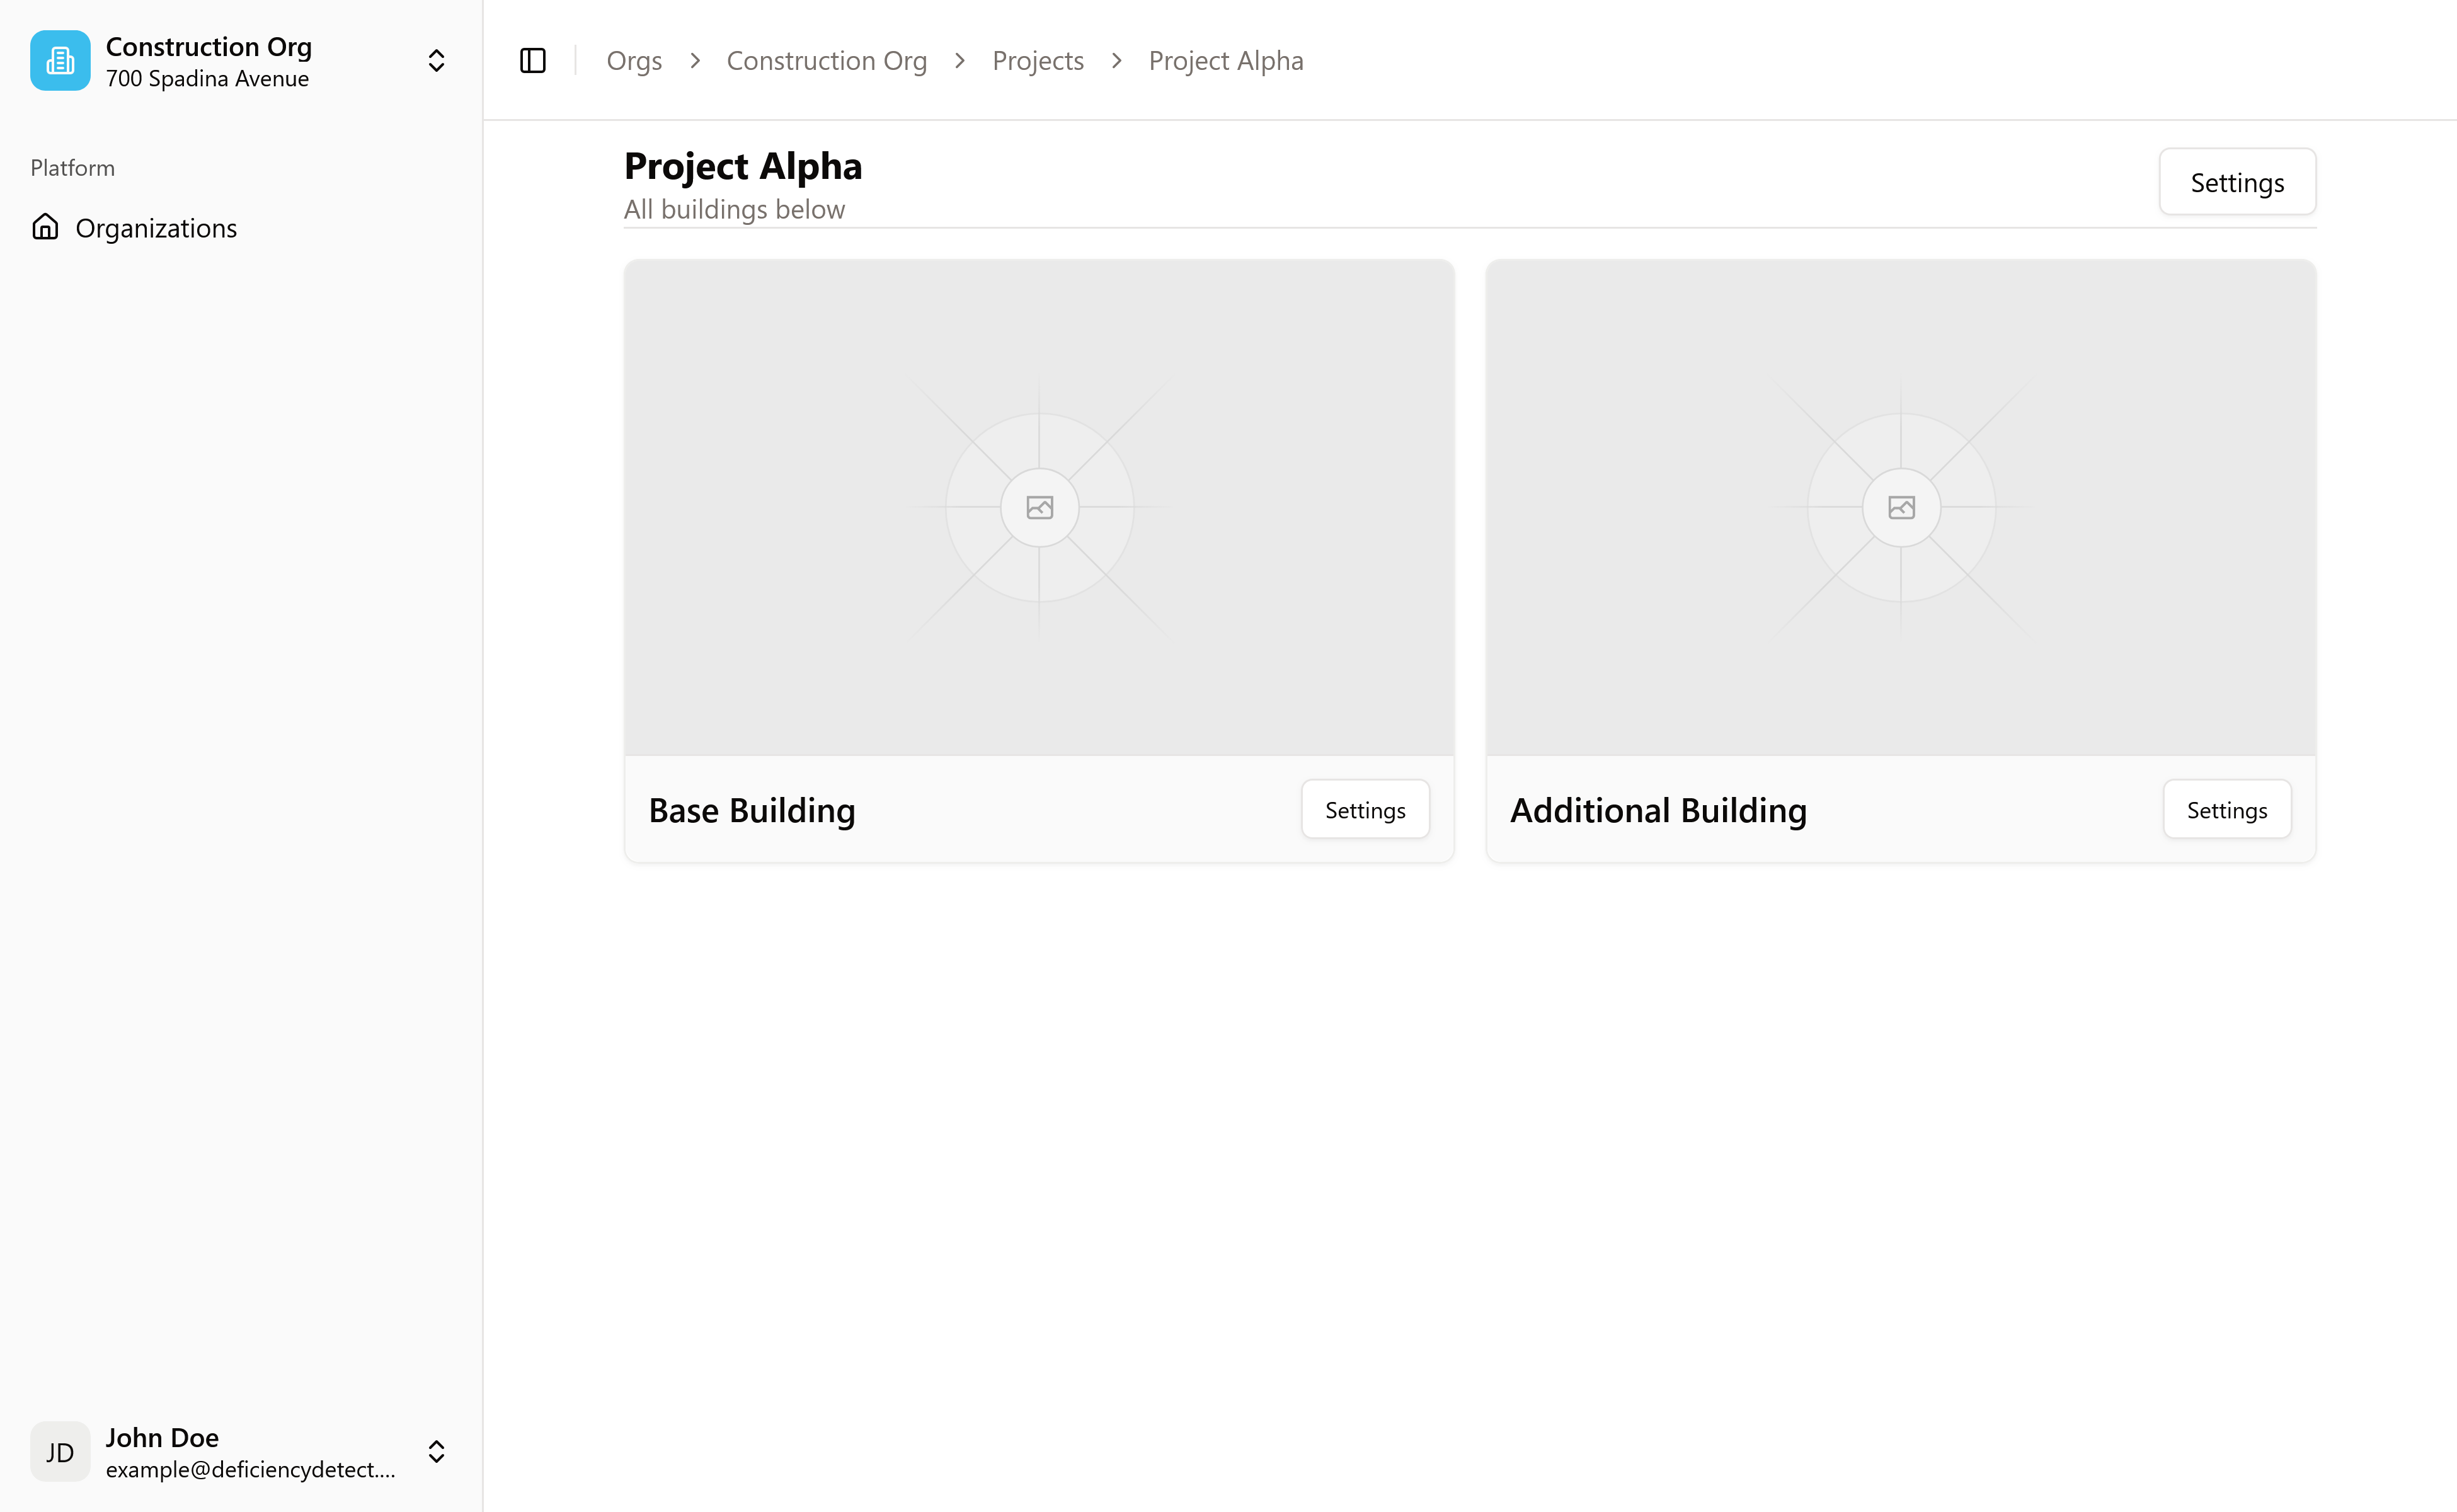
On the project's page, you'll see a list of buildings. Each building card will have a "Settings" button. Click this button for the specific building you wish to configure. This will lead you to the Building Settings page, which contains the Info, Trades, Floors, and Areas tabs.

Update Building Information and Photo
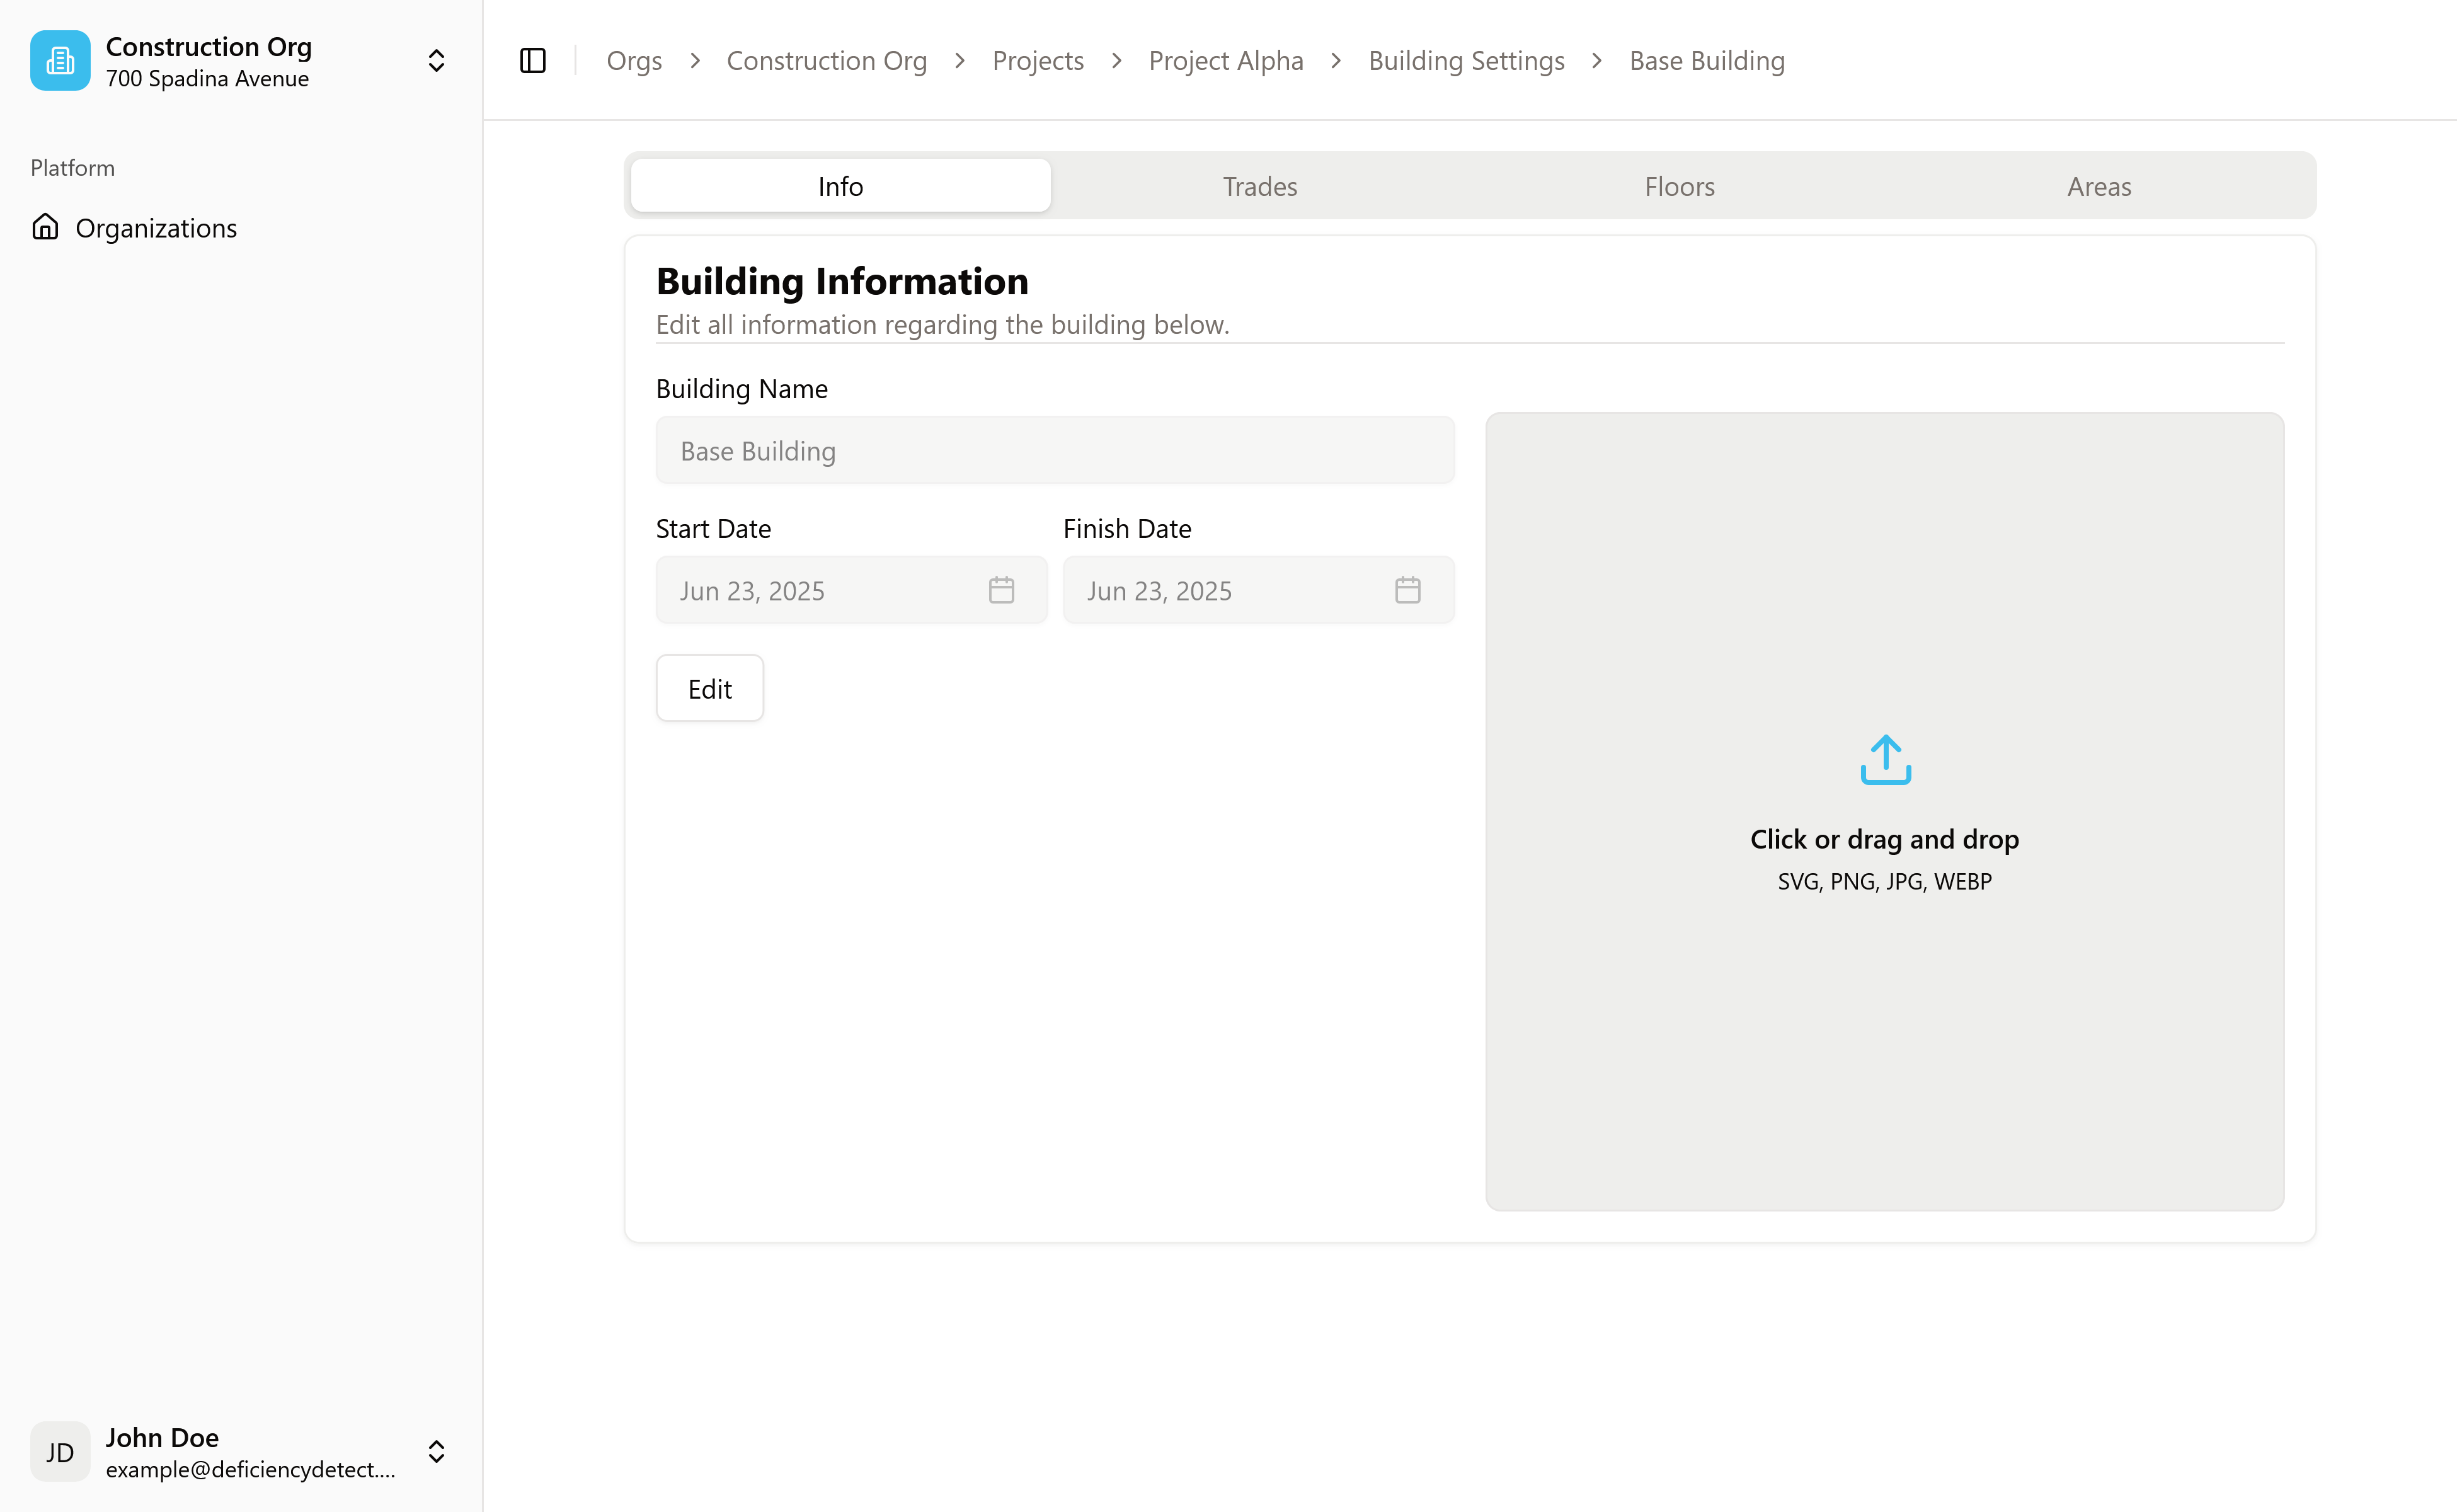
You will land on the "Info" tab by default. Here, you can:
- Update Building Information: Modify general details about the building (e.g., name, address, description).
- Upload Building Photo: Click or drag and drop a relevant image into the designated area to visually represent this building throughout the platform.

Once you've finalized the building's core information, you'll be ready to move on to the next crucial step: adding trade members to ensure precise communication and collaboration within this specific building.